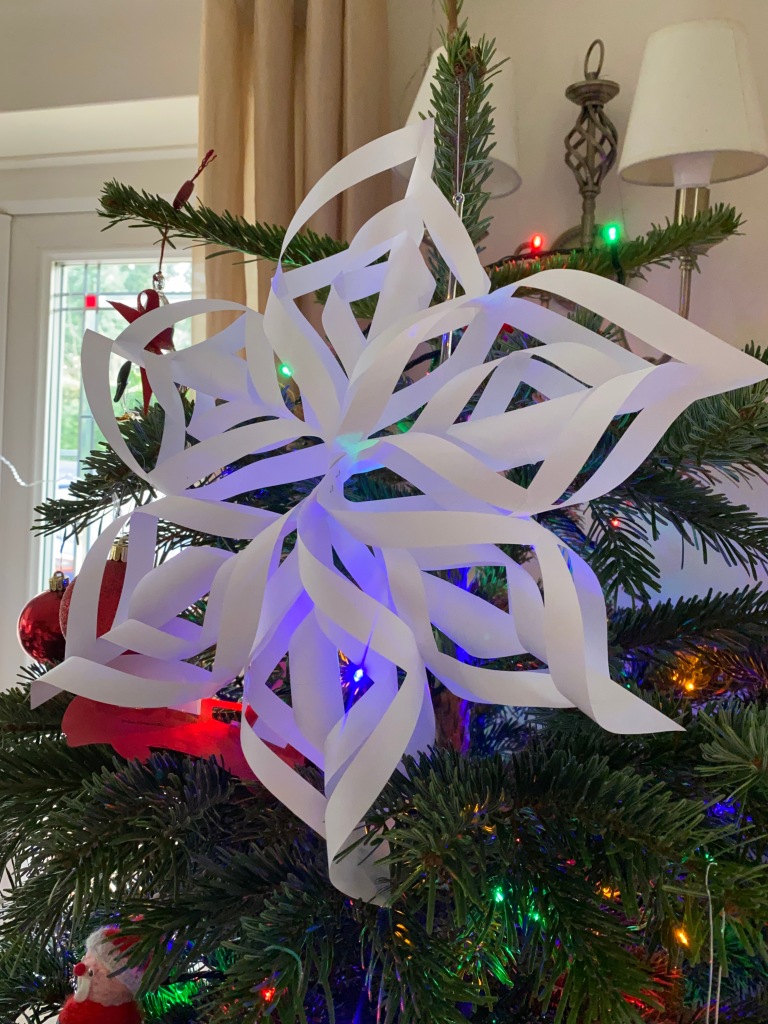

These 3D Snowflakes are beautiful aren’t they? They are straightforward to make with a bit of patience. Have a go at making different sizes of 3D snowflakes.
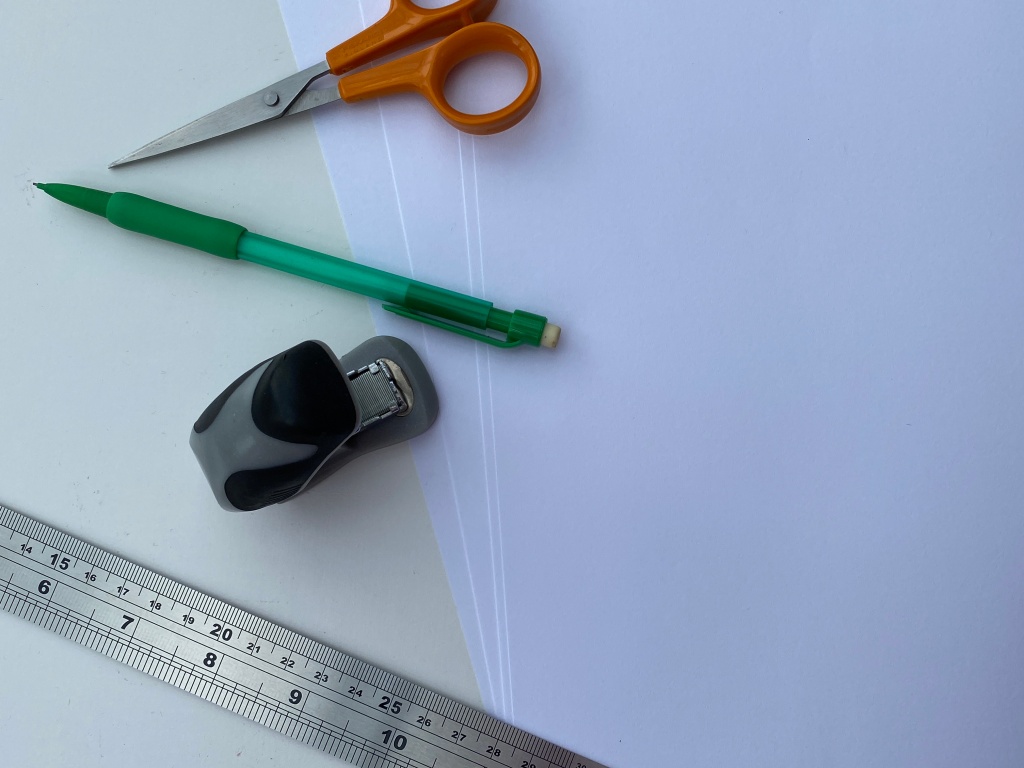
You will need:
- 3 sheets of A4 paper. This can be plain white, patterned, or coloured depending on what you would like your snowflake to look like.
- Scissors,
- a pencil
- a ruler
- glue or double sided tape
- a stapler
Each of the points of your snowflake are made separately. You will be able to get 2 points out of one sheet of A4, so bare that in mind when you are thinking about the colours for your snowflake. Your finished snowflake will measure approximately 30cm across.
Let’s get set up
Firstly, fold you A4 sheets in half and cut them. Fold the top corner over to meet the opposite side, then trim the bottom rectangle to leave you with a square.

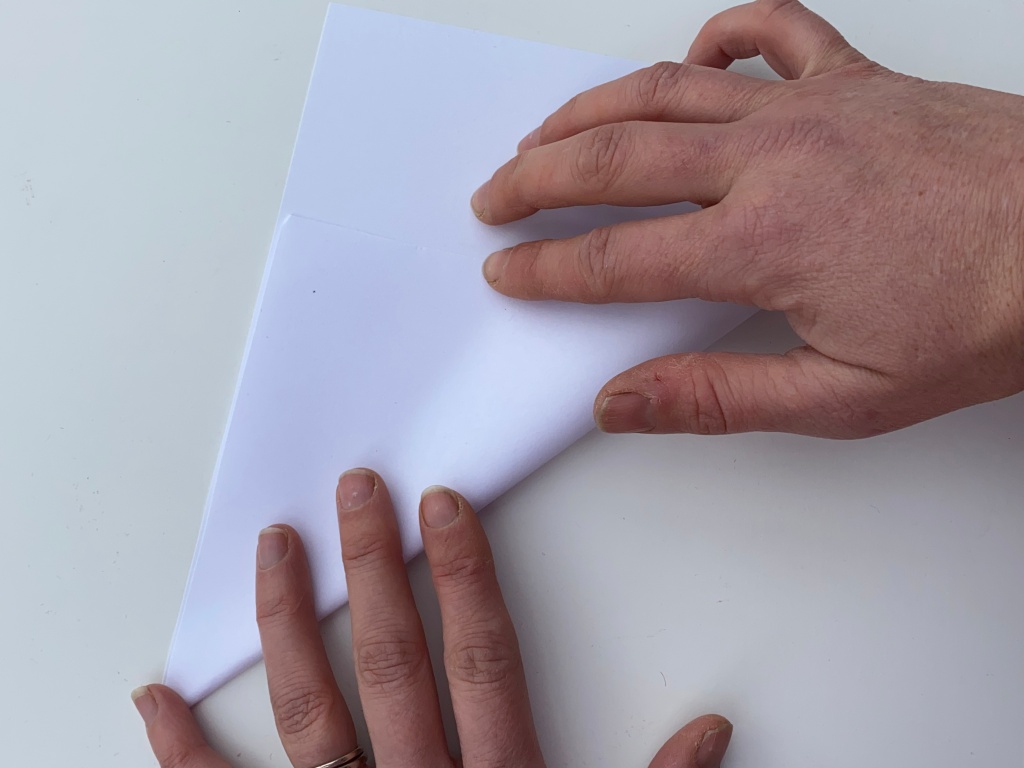

Repeat this step for the other 3 sheets of paper. You should end up with 6 folded triangles.
Along the folded edge, put a small pencil mark at 2cm, 4cm and 6cm. Fold your triangle in half again, making sure your pencil marks are on the top layer. Mark 1cm away from the new folded edge.

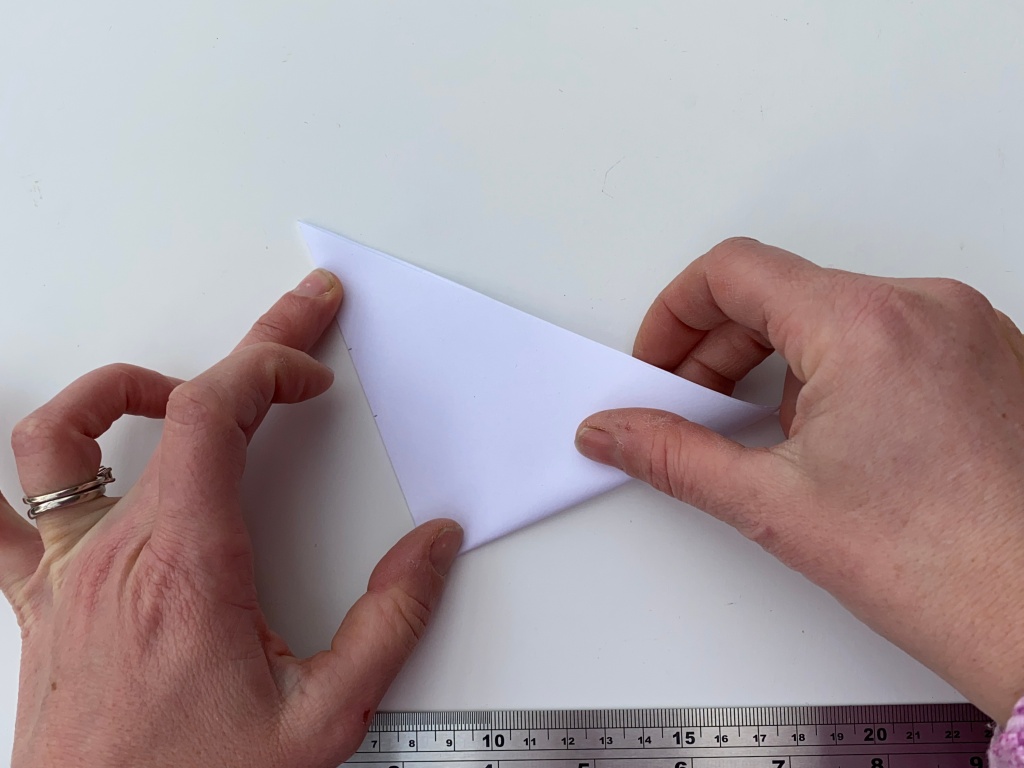

Draw a line all the way up the folded edge from the 1cm mark. From the top, mark this line at 2cm, 4cm and 6cm. Join these up with the marks you made earlier.


Cut your diagonal lines up the the 1cm margin. Very carefully rub out any pencil marks. Your paper is fragile now, so be careful with the rubber. If you rip it now, your 3D snowflake won’t work and you’ll need to start that point again. Carefully open out your square of paper. Hopefully it’ll look something like this.


Constructing the points of your Snowflake
Now for the fun part. Let’s start constructing your snowflake!!
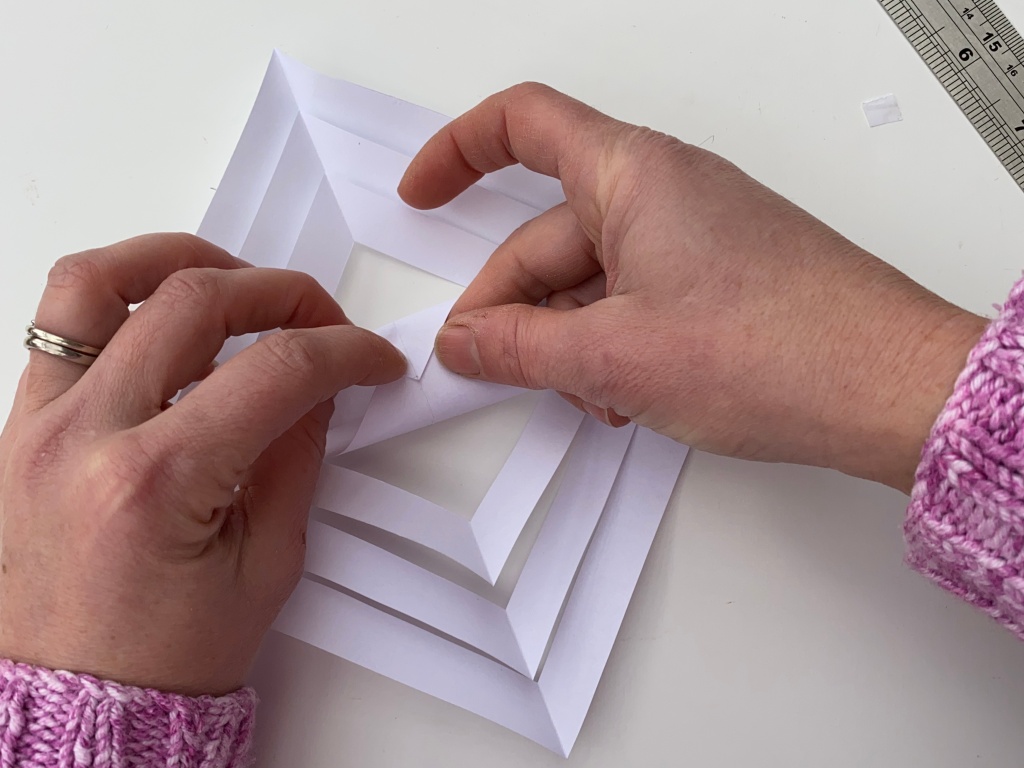
To give the points of your snowflake some volume, lift the middle two triangles add a spot of glue or a small piece of double sided tape on one side, and stick to the corners of the two triangles together. You’re aiming for a nice soft curve here, so make sure you layer them up to achieve this. If you’re not sure, play around with where to place them before sticking them down.
Turn your snowflake over and stick the next two sections together in the same way.
Turn your snowflake over again and repeat with the next sections. Keep turning over and sticking until you have run out of sections.


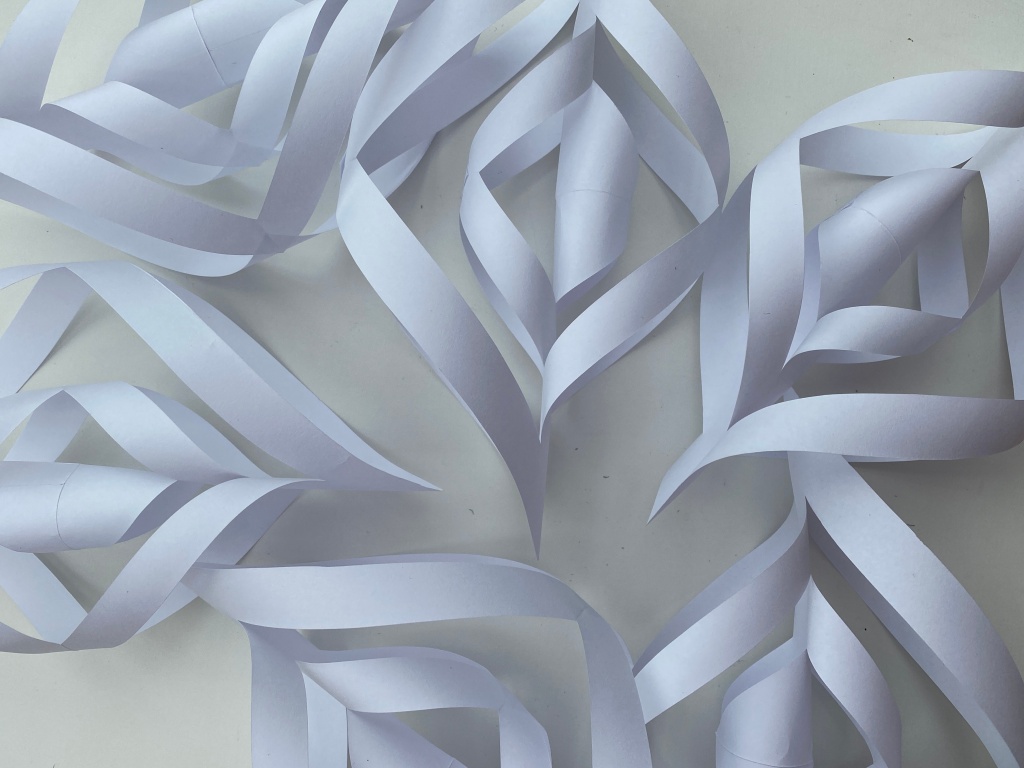
Repeat the construction for all six triangles your created in the set up earlier. You should end up with six points that look a little something like this.
,hxdkuytd]
Join 3 together with some glue or double sided tape, just as you did when constructing your points. Repeat this for the remaining three points.

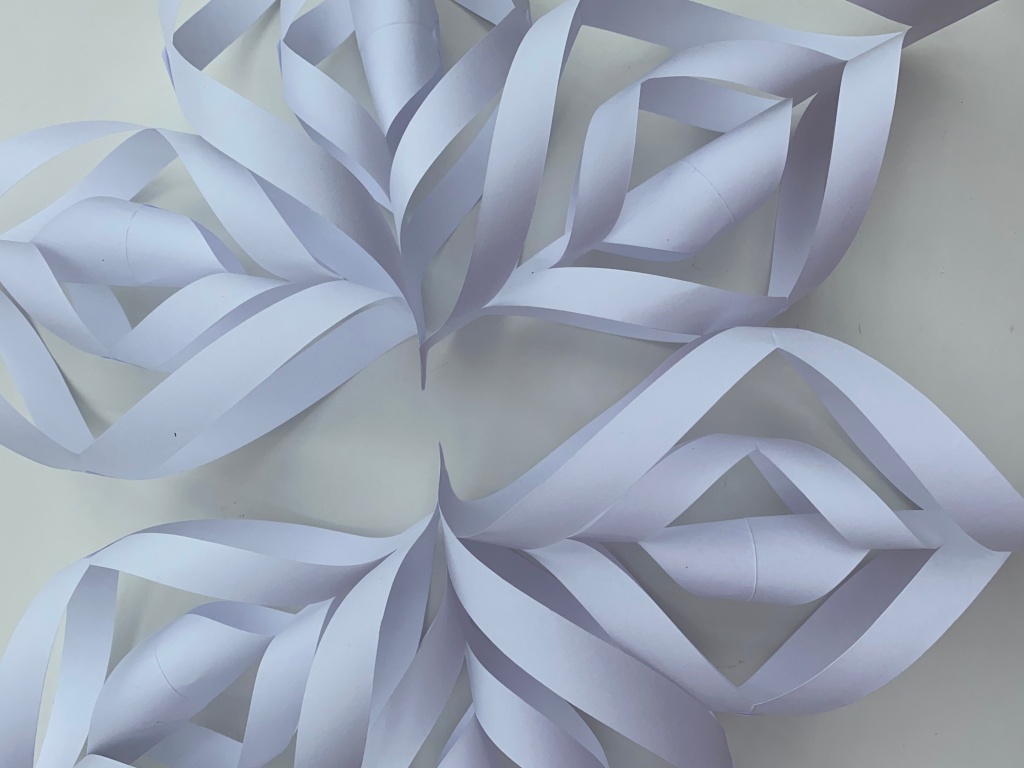
To finish off your 3D snowflakes, staple the 2 halves together. A staple is a bit stronger than the glue or tape, and this joint is holding a lot of tension. Finally, find somewhere to hang your 3D snowflake.