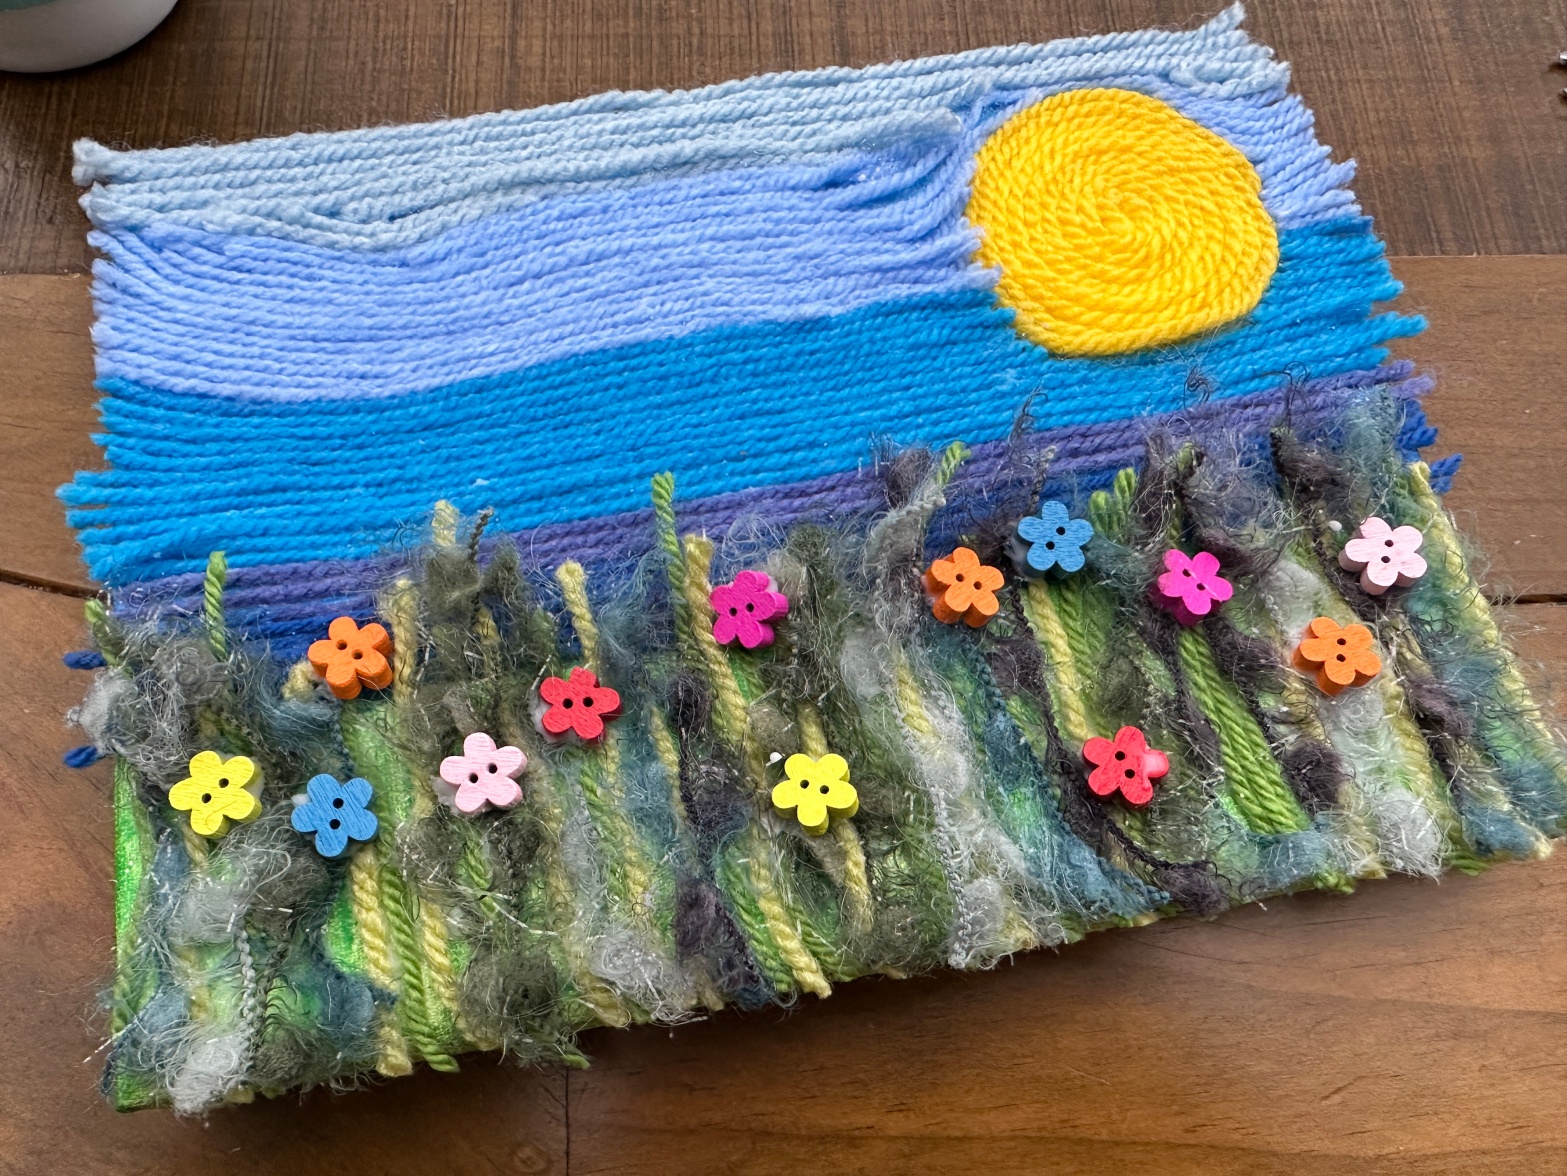
This Yarn Art Canvas project is a great way to develop creativity. You can decide on a design up front, or simply choose some yarn you like the look of and stick it down however you feel like as you go along. If you don’t have any yarn at home already, try search on eBay or other marketplaces for bundles of scrap yarn. The more variety in texture and weight or thickness, the more interesting your yarn art canvas will be. I wouldn’t recommend getting anything smaller than a double knit weight yarn. It’ll be much harder to work with.

You will need:
- pencil and paper – for sketching out your ideas
- paints – standard kids acrylic paints will work well here
- yarn scraps in various weights and textures – if you don’t have any yarn at home already, try search on eBay or other marketplaces for bundles of scrap yarn. The more variety in texture and thickness, the more interesting your canvas will be.
- standard school pva glue
- buttons or sequins to add embellishments if want to
- a brush for the paint and glue
- scissors to cut yarn
- a basic canvas. I used 5″x7″ canvas, but you can pick up any size you like fairly easily.
Decide on a Design for your Yarn Art Canvas
Start by sketching out some designs on a sheet of plain paper. These don’t have to be very accurate or very detailed. The idea is just to get your imagination flowing. I find the more ideas I doodle, the more ideas come to me.
If you can’t think of anything to draw, try drawing something you like…rainbows, monkeys, circles, the sea. Or maybe go for something that matches your room. Put pencil to paper and see what happens. Think about what colours and textures of yarn you have managed to find. Use the yarn you have as a guide, but don’t let it restrict your thought process too much. Let the ideas come to you.
Or go freestyle
If you’d prefer you can skip the design (and painting) stage altogether. Grab a yarn that would like the look of and get sticking in any pattern you like. It could be circles, or stripes, or a wandering pattern across the canvas. This way your yarn art canvas will be truly unique.
I drew a few designs, but ended up settling on meadow scene for my yarn art canvas. My sketch had a circle in one top corner, and a spiky line somewhere near the bottom for the grass. I added a few birds to my sketch as well. It wasn’t the most detailed or accurate of sketches, but it had created an image in my head, and that was enough.

When you have an idea you are happy with, lightly sketch it out your design on the canvas. This is just a guide to make the painting a bit easier. Drawing lightly means it will be easy to rub out and redraw if you make a mistake.

Paint blocks of bold colours on your canvas. These should largely follow the colour of the yarn you plan to use, but don’t worry if they differ slightly. I simply used yellow, blue (with a little white mixed in near the top of the canvas) and green for my meadow picture. The brush strokes followed the direction i intended to stick my yarn, but don’t worry too much about that. Don’t forget to paint along the edges as well if your design reaches the edges. Leave the paint to dry completely.
Preparing your Yarn
Where you can, cut the yarn into the lengths you will need for your yarn art canvas. This will be easy if you are doing a background or sky for example. You can measure the length of yarn against your canvas and design. Where you are making a spiral, it will be more tricky to judge how much yarn you need. If you are sticking without a design, cut your yarn into manageable lengths and go from there.
Adding Yarn to your Canvas
Once you have your yarn organised, add a decent amount of glue to a section of your canvas. I would recommend going section by section rather than covering the whole thing in glue at once.

For my meadow picture, I wanted a gradient effect for the sky. I had already cut lengths of various blues that were the same width as my canvas, so started with the darker shades at the bottom and worked my way up to the lighter shades at the top. After sticking down a few lengths of yarn, I realised I would need to complete the sun before finishing the sky. Spiralling my yellow yarn where I wanted the sun gave me a great contrast to the straight(ish) lines of the sky. Once the sun was complete, I trimmed the blue yarn to meet the sun, then stuck the remaining length on the other side, completing the picture.
The grass was worked in a vertical direction, overlapping the sky slightly. I cut various lengths of green yarn and stuck them down in a fairly random albeit vertical fashion. Grass isn’t very orderly after all.
Adding embellishments to your Canvas
With the grass done, my canvas was still missing something. I decided the grass needed some colour. I tried to create small spirals of yarn for flowers, but just ended up in a big sticky mess. In the end I scraped the small spirals and opted for using small flower buttons instead. If you have a similar design for your yarn art canvas, you could use yarn spirals to create flowers if you have the patience. Or maybe sequins or buttons if you have some, would work best for you.


